Adsense

Wednesday, 29 April 2020

Muskmelon Shots Recipe (खरबूजे का शरबत)


गर्मियां हैं, बच्चे घर में हैं और बच्चे क्या आज कल तो सभी घर मे है। हां जी ये लॉकडाउन का समय जो चल रहा है और घर पर बच्चे मतलब, कुछ न कुछ, हर समय सभी को खाने अथवा पीने के लिए चाहिए। मेरी यही कोशिश रहती है कि उनहे स्वाद के साथ साथ पौष्टिक आहार भी मिल जाए और उनका पेट भी भरा रहे। 

खरबूजा तो गर्मियों मे खूब आता है आप भी लाए होंगे और सभी ने खाया भी होगा। लेकिन यदि मैं आपसे ये पूछूँ कि आपने उनके बीज और बीज के साथ तरल पदार्थ व बचे गूदे का क्या किया तो ज्यादातर यही कहेंगे कि खरबूजा खा लिया परंतु तरल पदार्थ व बचे गूदे को बीजों सहित फेंक दिया या सिर्फ बीजों को धोकर सुखाने के बाद छीलकर हलवा इत्यादि बनाने में इस्तेमाल कर लिया। 

पर यदि आप हमसे पूछेंगे तो हम यही कहेगें कि हम सब कुछ इस्तेमाल कर लेते हैं सिर्फ छिलके गाय के लिए दूध वाले भाई को दे देते हैं, जी आपने ठीक पढ़ा, वह कैसे हम बताते है। 

जो मेरी माँ हमे देती थी बहुत ही पोष्टिक है वही मैं आज आपके साथ शेयर कर रही हूँ।

खरबूजा तो सभी स्वाद से खाते लेकिन खरबूजे के बीज उसका तरल पदार्थ और गूदे का ठंडा पेय जो मेरी माँ बनाती सभी बहुत स्वाद से पीते थे। चलिए बनाते है और घर मे सभी को पिलाते हैं। 

सामग्री -

  • दो खरबूजे 
  • दो चम्मच चीनी 
  • आधा गिलास ठंडा (मटके का) पानी 
  • काला नमक 

विधि -
1) पहले तो खरबूजे को खाकर उसका आनंद लीजिए। फिर आई बचे तरल पदार्थ और बीजों की बारी, जिसे आपने अलग बर्तन मे निकाला हुआ होगा।
2) अब उसे लें और मिक्सी में पीस लें और पिस जाने पर छलनी से छान लें। जो मोटा भाग छलनी मे रह जाए, उसे दोबारा से थोड़ा पानी डालकर पीस ले और छान ले। 
3) छलनी के मोटे भाग को फेंक दे और जो छाना हुआ शरबत है उसमे चीनी व काला नमक स्वाद के अनुसार मिला ले। बस हो गया घर का बना स्वच्छ, पोष्टिक ठंडा शरबत या जैसे मेरी बेटी कहती है, muskmelon shots तैयार।

एक बार पी कर तो देखिए आप भी कहेंगे वाह कितना स्वादिष्ट है। 

टिप्स - यदि आप ज्यादा पतला पीना पसंद करते है तो पानी, नमक व चीनी की मात्रा बढ़ा सकते हैं। आप इसे बर्फ डालकर भी पी सकते हैं। इसमे सारे बीज भी पिस गए है इससे ये और भी ज्यादा पोष्टिक हो गया है। 

Tuesday, 21 April 2020

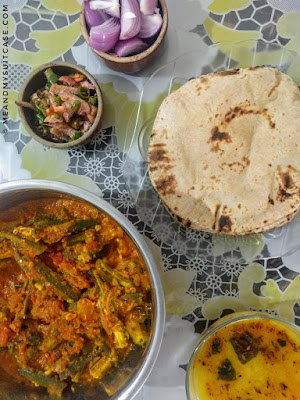
How to make Bhindi Masala at home | Amma Ki Rasoi

This recipe is contributed by Stuti of www.meandmysuitcase.com

How to make Bhindi Masala at home

Ingredients: 

  • Bhindi - 150 g
  • Tomato paste - 1.5 katori
  • Onion - 2 small or 1 large
  • Garlic and ginger paste - 2 spoons
  • Green chilli - 1 to 2
  • Curd - 0.5 katori
Masala:
  • Cumin seeds - 1 ts.
  • Dhaniya powder - 2 ts.
  • Paprika/red chilli powder - 0.5 ts.
  • Garam masala - 0.5 ts.
  • Salt to taste
  • 1 ts. Turmeric powder
How to make:
  1. Cut bhindi in to half both in length and width.
  2. Cut onion in thin slices
  3. Heat wok and add 1 ts. of sarson oil or ghee.
  4. Fry bhindi till it becomes dark green. Take it out in a separate plate.
  5. In the same wok another 1 ts. of the said oil or ghee.
  6. Once hot, add onion and fry till it turns translucent/ yellow in colour.
  7. Now add ginger-garlic paste to it and fry for a min or two.
  8. Add tomato paste and fry till oil starts to separate.
  9. Add all the ingredients under masala except garam masala
  10. Mix well. Now add yogurt to the wok and let it boil for a min.
  11. Now, add bhindi and check for consistency. If you want more gravy, you can add water. Check how think or thin gravy you want. Let it cook for some time.
  12. Add salt to taste and lastly add garam masala when the dish is almost ready.
  13. Masala bhindi is now ready to serve. Enjoy with fulka, naan or any bread you like.

Saturday, 18 April 2020

Homemade Spicy Momos and Dip - a healthy version

This recipe is contributed by Stuti of www.meandmysuitcase.com

Food Blog Amma Ki Rasoi Momos Recipe

Ingredients:

Homemade Dip
  • Tomatoes - 2 medium cut
  • Onion - 2 small cut
  • Garlic - 4 to 5 cloves minced
  • Ginger - 1 tbsp minced
  • Dhaniya powder - 1 tbsp
  • Red dry chilli
  • Green chilli
  • Ground nut
  • Salt - as per taste
  • 1 tsp oil
  • Oregano - 1 tsp (optional)
  • Tobasco - a few drops (optional)

Momos' stuffing
There is no dearth of options when it comes to veg stuffing for momos. Considering lockdown and available stock at home, we used the following:

  • 03 to 4 tbsp of minced cabbage, cauliflower, beans, capsicum
  • 3 to 4 tbsp of peas
  • Green chillies cut as per taste
  • 1 tbsp of minced garlic
  • 1 tbsp crushed ginger
  • 2 tbsp finely chopped Fresh Coriander leaves
  • Salt to taste

Momos' wrappers
  • 1 bowl Whole wheat
  • Salt to Taste
  • Water for kneading dough
  • 1/2 tsp oil for smooth and shiny dough
Let's prepare...

Dip -
  1. Keep wok on gas, once little hot add oil.
  2. Then add garlic and ginger, saute for a minute
  3. Add onion, saute till it turns translucent
  4. Add red dry chilli and add ground nuts. Now saute well.
  5. Add green chillies, tomatoes, salt and dhaniya powder. keep sauting.
  6. Once cooked, take wok off the fire and keep aside for cooling it down.
  7. Once cool, blend it properly. Add water for right consistency.
  8. In the end add oregano and tobasco drops. Mix well. Your dip is ready.

Momos' stuffing:

  1. Boil water in a big utensil.
  2. Now, blanch minced cabbage, cauliflower, beans, capsicum in the boiling water along add peas and finely chopped green chillies. Add salt to taste.
  3. Take the veggies out after roughly 3 minutes and strain well (don't throw the water, you can use it in kneading the dough)
  4. Now, keep wok on gas, once little hot add oil.
  5. Then add garlic and ginger, saute for a minute
  6. Now add strained veggies which you have just blanched. Saute well.
  7. Once done, add finely chopped coriander and mix well. Your momos stuffing is ready.
Food Blog Amma Ki Rasoi Momos Recipe

Momos' wrappers
  • In a utensil, add salt in aata (whole wheat) and knead the dough well using water you saved from blanching veggies.
  • In the end, use oil to give the dough smoothness and shine.
The final round
  1. Take small small portion from dough and make small rotis, just enough size to make momos.
  2. Place stuffing in the centre and wrap the roti in dimpling style.
  3. Once one batch is ready, steam them. For that, in cooker or a big utensil boil some water.
  4. Now, take a container, grease it and place momos in it. Now keep this container in the cooker with boiling water (water should not go above container level) 
  5. Cover the cooker and stream for 10 min or till momos are cooked.
  6. Once cooked enjoy your super healthy momos with super healthy dip.

Tuesday, 14 April 2020

Cauliflower Stalk - Kofte Recipe - फूलगोभी की डंठल के कोफ्ते

समय परिवर्तन क्या होता है वह इस लॉकडाउन ने अच्छे से हर प्राणी को सिखा दिया, समय का क्या है चलता रहेगा सिखाता रहेगा |  इस वक्त को हम कैसे जीते है ये हमारी  ही  सोच पर निर्भर करता है |

हां ये सत्य है, आजकल घर से निकलना एक दम बंद है इसलिए जो भी खाने की सामग्री घर मे है उसी से कुछ बनाकर आनंद लेना है, मैने भी आज ऐसा ही किया | ये कहावत भी सत्य प्रतीत हुई आम के आम गुठलियों के दाम| आज मैने फूल गोभी की डंडी के कोफ्ते बनाऐ, जी आपने  ठीक ही पढ़ा, फूल गोभी की डंडी के कोफ्ते, जिसे हम आमतौर पर फ़ेंक देते हैं | इन कोफ्तों को खाते ही मेरा पूरा परिवार खुश हो गया, मेरा बेटा तो कोफ्ते के नाम से ही खुश हो जाता है|  लेकिन खाने पर और  खूब खोजबीन के बाद भी कोई घर में यह न बता पाया कि इतने स्वादिष्ट कोफ्ते बने किस चीज के हैं |

आप भी एक बार तो अवश्य ही बनाए आपको खुद विश्वास नही होगा कि फूलगोभी की डंठल / डंडी से भी इतना स्वादिष्ट आहार बनाया जा सकता है।  मेरा एक्सपेरिमेंट  तो  कामयाब हुआ, अब आप इस रेसिपी को ज़रूर आज़माएँ, कमैंट्स में ज़रूर बतलायें की कैसा बना |  

सामग्री -

  • फूल गोभी की डंडियां (दरदरी पिसी हुई) या बारीक पिसा पेस्ट
  • पिसी हुई प्याज 
  • अदरक, लहसुन व हरी मिर्च का पेस्ट
  • पिसा हुआ टमाटर 
  • हरा धनिया
  • बेसन
  • तेल 
  • सभी जरूरी मसाले जैसे जीरा, सूखा धनिया, हल्दी, लाल मिर्च पाउडर, गरम मसाला और नमक स्वादानुसार  


विधि -

सभी डंडियों को अच्छे से धोकर साफ कर ले, जो कोमल डंडियां है उन्हें वैसे ही ले ले और जो सख्त हैं, उनको चाकू से छीलकर बीच का कोमल भाग ले ले व साथ की हरी पत्तियाँ भी डालकर पीस लें| अब बड़े बर्तन में  निकाल कर अपने स्वाद के अनुसार नमक व हरी मिर्च, अदरक, लहसुन का पेस्ट डाल ले| अब इसमे आवश्यकता अनुसार बेसन व चुटकी भर सोड़ा  डालकर मिला लें  और गोल गोल आकार देकर मध्यम आंच पर तल लें | यह ध्यान रहे की इन कोफ्तो को  बनाने में पानी का इस्तेमाल नहीं करना है | 


ग्रेवी के लिए एक कढ़ाई मे दो चम्मच तेल गरम करे| फिर उसमे जीरा डाले और हल्का भुनने पर हरी मिर्च अदरक लहसुन का पेस्ट डालकर थोड़ा और भून ले | फिर प्याज का पेस्ट डाले और भून ले जब तक वह हल्का पीला हो जाये |  जैसे ही मसाला तेल छोडने लगे तो पिसा हुआ टमाटर डाले और कढ़ाई ढक कर हल्की आंच मे पकाए| आवश्यकता के अनुसार पानी डाले और पक जाने पर गरम मसाला डाले और गैस बंद कर दें |


 सर्व करते समय कोफ्ते कढ़ाई मे डाले और गरम कर ले ऊपर से क्रीम और/या  ग्रेट किया पनीर डाले और हरी मिर्च, कटा हरा धनियां से गार्निश करके खाएं |  


टिप्स - कोफ्तों को बिना ग्रेवी आप शाम की चाय के साथ, गरम गरम खट्टी चटनी या सोस से भी खा सकते हैं|  


यदि आप  लहसुन प्याज नही खाते है तो हींग और अदरक का पेस्ट अवश्य डालेटमाटर ज्यादा खट्टे हो तो ग्रेवी मे आधी चम्मच चीनी डाल सकते हैं |

Thursday, 9 April 2020

Mawa Parantha Recipe | Indian Food - मावे का पराठा

काफी सोच विचार के बाद आज मैने मावे के पराठे बनाए, ये सत्य है, क्योकि काफी समय से पूरा परिवार यहां तक कि पूरा देश अपने अपने घरो मे चौबीसों घंटे रह रहा है और ऐसे समय पर बच्चों पर पूरा ध्यान रखना जरूरी हो जाता है ।  बस यही सोचकर जो भी सामान घर मे सुलभ था उसी से बना दिया। ये मुझे भी पता न था कि इतना स्वादिष्ट होगा आप भी अवश्य बनाकर देखे खुद खाने पर ही इसके स्वाद का आनंद ले सकेंगे। 


सामग्री -

  • मलाई से बनाए गए घी का मावा - एक कटोरी
  • पिसी चीनी - एक कटोरी 
  • सूखा नारियल पाउडर - आधी कटोरी
  • इलायची पाउडर - आधा टेबल स्पून 
  • बादाम पाउडर - पाचं टेबल स्पून 
  • शुद्ध घी 
  • पराठा बनाने के लिए गेहूँ के आटे का डो
  • ठंडी मलाई 

Mawa Parantha Recipe by Amma Ki Rasoi


विधि -
1) मावे को एक बडे़ बर्तन मे डाल ले, अब इसमे नारियल पाउडर, पिसी चीनी, इलायची पाउडर व बादाम पाउडर डालकर सभी को आराम से मिला ले, मिलाने के बाद एक बार अवश्य चखकर देख ले यदि आप को मीठा कम लगे तो और चीनी मिला सकते है। 

2) पराठे से थोड़ी छोटी आटे की लोई बनाकर उसमे थोड़ा सा यानी दो चम्मच मावे का मसाला भरे और हल्के हाथ से बेले।  


3) फिर तवे पर पराठे को डालकर शुद्ध घी से सेकें। ध्यान रहे सेकते समय पराठे को दबाना नही है यदि आप दबाएंगे तो उसका मीठा मसाला बाहर निकल जाएगा और चीनी तवे पर चिपकने लगेगी और जल जाएगी इससे स्वाद खराब हो जाएगा । 

अब आप इस स्वादिष्ट पराठे को ठंडी मलाई के साथ खाएं, एक कौर खाते ही अवश्य कहेंगे वाह क्या पराठा है। 

How to make Mawa Parantha


नोट - इस पराठे को तेज आचं पर नही सेकना है। पराठे को ज्यादा जोर से दबाते हुए नही सेकना है। आप अपनी इच्छा के अनुसार और भी मेवे डाल सकते हैं। चीनी की जगह आप खजूर को पीसकर भी मिला सकते है। 

Friday, 3 April 2020

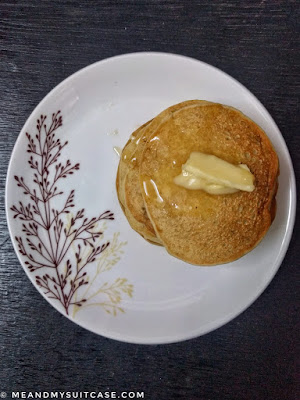
How to make Banana Pancake | Easy to make recipe

This recipe is contributed by Stuti of www.meandmysuitcase.com

Amma Ki Rasoi - Banana Pancake Recipe during lockdown


Ingredients: 
  • 3 ripe/ over-riped bananas
  • 1 katori maida
  • 1.5 to 2 katori milk
  • 3 ts. grinded sugar
  • 2 pinches of elaichi powder
  • 0.5 ts. baking soda
  • 1 ts. baking powder
How to make:

1) Take one big bowl and all dry ingredients except baking powder and baking soda. Mix well.

2) In a separate bowl mash bananas in a way that no lumps remain. 

3) Now add mashed bananas to the dry mix and mix it well.

4) Now keep adding milk in the batter to get right consistency to be able to pour it on the pan for making pancakes (go for consistency like of dosa paste)

5) Once it is mixed well, add baking soda and powder to the batter, mix slowly and let it set till you heat the pan. 

6) Use non stick pan and just brush it with ghee.

7) Once the pan and ghee is little hot, start pouring the mix on pan in small circles 

8) Let it cook from one side completely before flipping (when you start seeing bubbles on top of non fried side, that means the bottom is cooked)


Easy to make Banana Pancake Recipehow to make banana pancake at home

9) Flip the pancake and let the other side cook as well.

10) Once done transfer to the plate, make 5 - 6 & keep placing them one over the other.

11) Eat them hot with butter, honey or chocolate syrup or combination of any two of these toppings. 

lots of pancake, easy to make at home

Tip: You can also add honey to the batter.